Creating a blog website has never been easier, thanks to PostX. With its pre-built starter packs and intuitive features, you can set up a professional-looking blog in just three clicks! Whether you’re a beginner or an expert, this guide will show you how to launch your blog effortlessly.
Step 1: Install & Activate PostX
The first step is to install and activate the PostX plugin on your WordPress website.
- Go to WordPress Dashboard > Plugins > Add New
- Search for PostX
- Click Install Now and then Activate

✅ First Click Done!
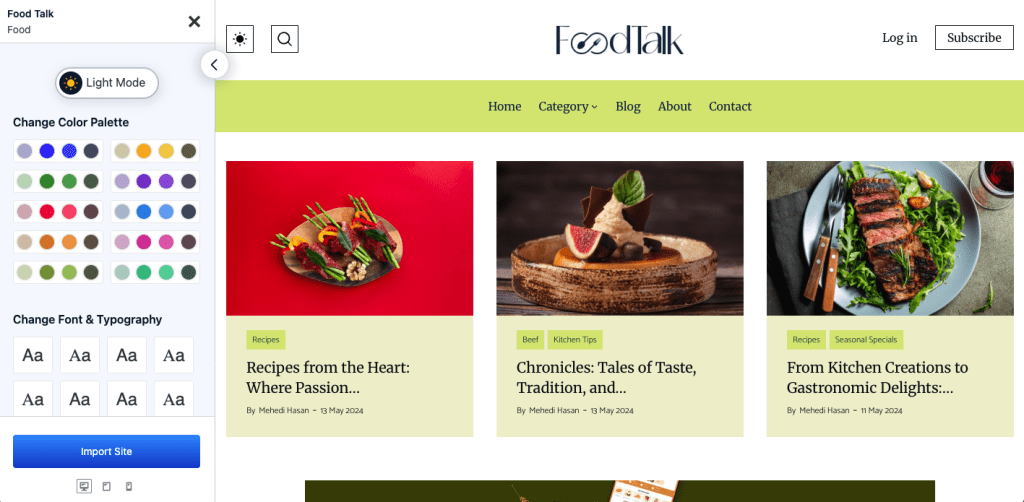
Step 2: Choose a Ready-Made Starter Pack
PostX provides Starter Packs—beautifully designed blog layouts that you can import instantly.
- Navigate to PostX > Starter Packs
- Browse the available templates and pick your favorite
✅ Second Click Done!

Step 3: Publish Your template
Once the Starter Pack is imported, your website is ready!
- The design will be applied to your blogs .
✅ Third Click Done! Your blog is now live! 🎉

Why Choose PostX?
- One-Click Starter Packs – Get a beautiful blog layout instantly.
- Customization Without Coding – Easily adjust colors, fonts, and layouts.
- SEO-Optimized – Helps your blog rank higher on search engines.
- Lightning-Fast Performance – Ensures a smooth user experience.
Final Thoughts
With PostX, building a professional blog website is effortless. In just three clicks, you can install the plugin, import a stunning layout, and publish. No complex coding, no hassle—just click, import, and publish!
Ready to start your blogging journey? Install PostX today and go live in minutes!